Each layer needs to be adjusted to make the image look best. The gradient map layers each have a layer mask which can (and should) be painted on, to lighten areas which end up to dark. I use a black brush set at about 25% opacity, painting on the mask to lighten up areas which have lost detail. Additionally, you can simply delete the Layer 2 grad map to go with the 1st version of the image. Again, paint in black/grey on the layer mask to lighten areas. Finally, tweak the curves layer to how you like it.
Original Image:

With gradient layer 1:

With gradient layer 1 and gradient layer 2:

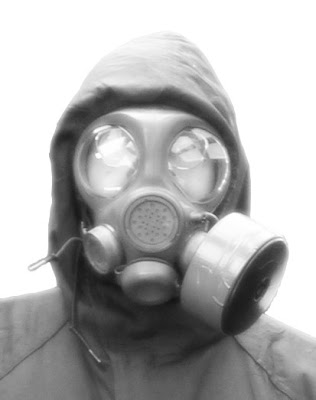
Another image, with the full action and touched-up layer masks to lighten blocked-up shadow detail:
 Disclaimer: my images are optimized for my monitors, which I color-calibrate with a Spyder3Pro colorimeter, so i can't promise how they'll look on yours! Go buy one!
The action can be downloaded here.
1 comment:
oooh fancy!
Post a Comment